You want to feel as safe as possible when driving. It’s natural to be concerned when you hear a Clicking Noise from Front Wheel When Driving. Before operating any vehicle on a road with other traffic, it must be safe.
Clicking Noise from Front Wheel or any Wheel When Driving could result from any of the following components:
- Damaged constant velocity joint
- Worn or damaged struts
- Loosely or broken hubcaps
- Worn drive belt or worn drive belt tensioner
- Tires of the wrong size or worn with cupping
- Suspension being loose
A driving test is essential to detect the sound made by the wheels while diagnosing a clicking or popping sound from the wheels. Before you put the car through its paces, you should stroll around it to verify that nothing is coming off.
Part 1 of 6: Diagnosing a damaged constant velocity joint
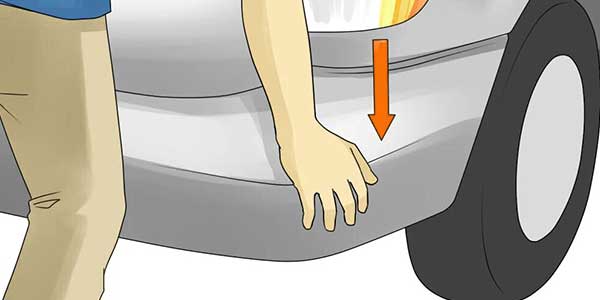
Step 1: Press down on the vehicle’s front and back bumpers. This will determine whether the joints are locked in a vertical motion.
Step 2: Turn on the engine. Turn the wheels from right to left, lock to lock. This will determine whether the joints are locked in a horizontal motion.
Step 3: Navigate the block with the car. Make turns where you may fully turn the steering wheel in one direction. Keep an ear out for any clicking or popping noises.
During strong turns, the outer joint usually receives all of the punishment and generates a clicking or popping sound. This is due to the fact that the balls in the joint are worn and lack lubrication. The balls fit into a cage that allows them to revolve in tandem with the wheels. The constant velocity joints may provide angles of up to 47 degrees.

Step 4: Drive over any bumps or potholes. This will determine whether the CV joints make a clicking or popping sound as the wheels rotate and move vertically.
Following the road test, you must prepare the vehicle to inspect the constant velocity shafts to see if they need to be changed.
Preparing the vehicle to check the CV shafts
Materials Needed
- Flashlight
- Jack 2 ton or bigger
- Jack stands
- Wheel chocks
Step 1: Park your car on a level, firm surface. Check that the gearbox is in park (for automatics) or first gear (for manuals) (for manuals).
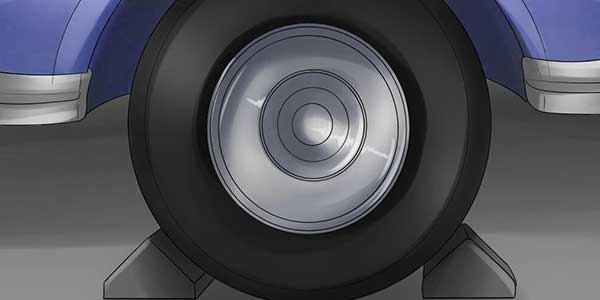
Step 2: Secure the rear tires that will stay on the ground with wheel chocks. Apply the parking brake to prevent the back tires from moving.
Step 3: Raise the car. Lift beneath the car at its stated jacking locations using a floor jack appropriate for the vehicle’s weight until the wheels are entirely off the ground.
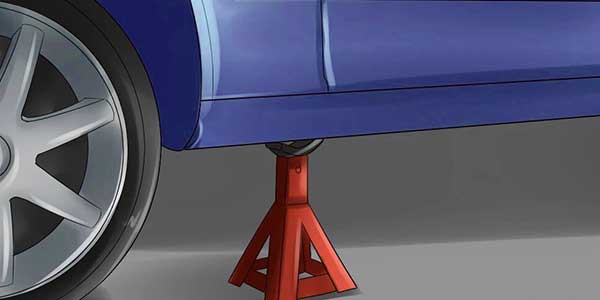
Step 4: Place the jack stands. The jack stands should go under the jacking point locations. Then lower the vehicle onto the jack stands. For most modern cars, the jacking points for jack stands will be on the pinch weld just under the doors along the bottom of the car.
Checking the condition of the CV shaft
Step 1: Take a flashlight and examine the joints’ boots. Check to see whether the boots are ripped or if any band clamps are missing.
Note: If there is oil surrounding the boots and the boots are off the joints or have a cut in them, the diagnostic for that constant velocity shaft can be terminated. Once the boot is removed, within 12 seconds of typical vehicle movement, the CV joints become polluted and begin quick internal degeneration.
Step 2: Grab the constant velocity shaft and push up and pull down on it. This will check to see if there is excessive movement in the shaft joints.
Lowering the vehicle after performing the diagnosis
Step 1: Gather all of your tools and creeper and position them out of the way.
Step 2: Raise the car. Lift beneath the car at its stated jacking locations using a floor jack appropriate for the vehicle’s weight until the wheels are entirely off the ground.
Step 3: Remove the jack stands and store them in a safe place away from the car.
Step 4: Lower the car until all four wheels are in contact with the ground. Remove the jack and set it aside.
Step 5: Take the wheel chocks off the back wheels and set them aside.
More: Car Makes Rattling Noise When Accelerating
Part 2 of 6: Diagnosing worn or damaged struts
Step 1: Press down on the vehicle’s front and back bumpers. This will determine whether or not the strut shocks are functioning properly. The strut shock will pop in and out of the strut tube if the strut housing becomes damaged.
Step 2: Turn on the engine. Turn the wheels from right to left, lock to lock. This will determine whether or not the bearing plates generate a clicking or popping noise when the car is stationary.
Step 3: Circumnavigate the block with the car. Make turns where you may fully turn the steering wheel in one direction. Keep an eye out for any clicking or popping noises.
The struts are designed to turn with the wheels as the struts have a mounting surface for the wheel hub. While checking the struts for sounds, feel the steering wheel for any movement as if the mounting bolts to the wheel hubs could be loose making the wheels move in and out of alignment.
Step 4: Drive the vehicle over bumps or potholes. This checks the condition of the strut shaft and if there are any broken internal parts or dented shells.
- Note: If you see oil present on the housing of the strut, you would need to consider replacing the strut with a new or rebuilt strut.
Preparing the Vehicle to Check the Struts
Materials Needed
- Flashlight
- Jack 2 ton or bigger
- Jack stands
- Pry bar
- Wheel chocks
Step 1: Park your car on a level, firm surface. Check that the gearbox is in the park (for automatics) or first gear (for manuals) (for manuals).
Step 2: Secure the rear tires that will stay on the ground with wheel chocks. Apply the parking brake to prevent the back tires from moving.
Step 3: Raise the car. Lift beneath the car at its stated jacking locations using a floor jack appropriate for the vehicle’s weight until the wheels are entirely off the ground.
Step 4: Place the jack stands. The jack stands should go under the jacking point locations. Then lower the vehicle onto the jack stands. For most modern cars, the jacking points for jack stands will be on the pinch weld just under the doors along the bottom of the car.
Checking the Condition of The Struts
Step 1: Grab a flashlight and look at the struts. See if the housing to the struts are dented or leaking oil. Look at the bearing plate to see if there it is separating. Check the mounting bolts to the hub and ensure that they are tight using a wrench.
Step 2: Grab a long pry bar. Pry up on the tires and check for any movement. Be sure to see where the movement is coming from. The wheels can move around if the ball joint is worn, if the mounting hub bolts are loose, or if the hub bearing is worn or loose.
Step 3: Open the hood to the engine compartment. Locate the mounting studs and nuts to the bearing plate. Check to see if the bolts are tight using a wrench.
Lowering the Vehicle after Performing the Diagnosis
Step 1: Collect all tools and your creeper and place them out of the way.
Step 2: Raise the vehicle. Using a floor jack that is recommended for the weight of the vehicle, lift under the vehicle at its specified jacking points until the wheels are completely off the ground.
Step 3: Remove the jack stands and keep them far away from the vehicle.
Step 4: Lower the vehicle to where all four wheels are on the ground. Pull out the jack and put it aside.
Step 5: Remove the wheel chocks from the rear wheels and put the aside.
Part 3 of 6: Diagnosing Loosely or Broken Hubcaps
Step 1: Take the car around the block. Make turns when the vehicle may be turned in many ways. Keep an ear out for any clicking or popping noises.
Step 2: Drive over any bumps or potholes. Keep an ear out for any clicking or popping sounds that may occur as the hubcaps shift.
Step 3: Increase the speed of the vehicle to 40 to 45 miles per hour. If the hubcaps are fractured, they will create a clicking or popping sound when the wind rushes through the hubcap.
Preparing the Vehicle to Check the Hubcaps
Materials Needed
- Flashlight
- Large flat screwdriver
- SAE/Metric socket set
- Wheel chocks
Step 1: Park your car on a level, firm surface. Check that the gearbox is in park (for automatics) or first gear (for manuals) (for manuals).
Step 2: Secure the rear tires that will stay on the ground with wheel chocks. Apply the parking brake to prevent the back tires from moving.
Examining the Condition of the Hubcaps
Step 1: Take a flashlight and examine the hubcaps. Examine the hubcap for any fractures or damage. Examine the hubcap to verify if it was properly installed.
When wheels are rotated or tires are replaced, hubcaps are often put improperly, covering the valve stem to the tire. This will cause a wobble and the hubcap to rattle.
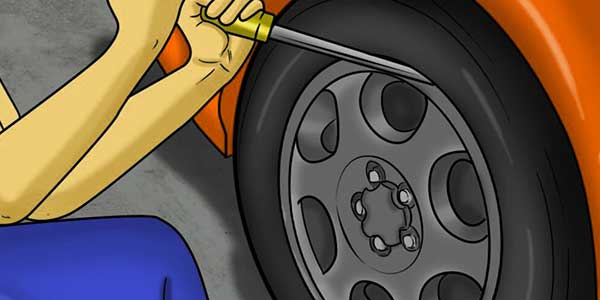
Step 2: Take off the hubcap. To remove a hubcap that is held in place by plastic screw nuts, use a socket set. Look for any damage to the mounting tabs or the inner ring.
Step 3: Replace the hubcap. If the hubcap was misplaced, you would need to replace it where the valve stem to the tire is visible. Then remove the tire chocks and perform another road test to confirm that was the issue.
If the hubcap is still clicking or popping, it may have a crack in it. Replace the wheel chocks and use your flashlight to check for any cracks.
Cleaning Up After Performing the Diagnosis
Step 1: Collect all tools and your creeper and place them out of the way. Remove the wheel chocks from the rear wheels and put them aside.
More: Check Engine Light Car Shakes When Accelerating
Part 4 of 6: Identifying a Worn Drive Belt or Drive Belt Tensioner
Step 1: Start the engine by inserting the key into the ignition. Allow the engine to idle for a few seconds before rapidly accelerating.
Step 2: Listen for a clicking or popping sound when the engine’s RPM increases and falls. As the drive belt or tensioner wears, the belt stretches and smacks the frame, fender, or bracket.
Preparing the Vehicle to Check the Drive Belt or Drive Belt Tensioner
Materials Needed
- Flashlight
- Wheel chocks
Step 1: Park your vehicle on a flat, hard surface. Make sure that the transmission is in the park (for automatics) or in 1st gear (for manuals).
Step 2: Place wheel chocks around the rear tires that will be remaining on the ground. Engage the parking brake to lock the rear tires from moving.
Checking the Condition of the Drive Belt or Drive Belt Tensioner
Step 1: Open the hood to the vehicle’s engine compartment. Grab a flashlight and check the drive belt and drive belt tensioner condition.
Step 2: With the engine off, grab the drive belt and pull on it. The belt should not move easy and should only move its width in distance.
Step 3: With the engine running, have someone step on the accelerator quickly. As the engine rises up and down, watch the belt and tensioner with a flashlight to see what the drive belt and drive belt tensioner is doing.
Cleaning Up After Performing the Diagnosis
Step 1: Collect all tools and your creeper and place them out of the way. Remove the wheel chocks from the rear wheels and put the aside.
Part 5 of 6: Diagnosis of incorrectly sized or worn tires with cupping
Materials Needed
- Flashlight
Step 1: Using a flashlight, visually inspect the vehicle’s tires. While the car is at rest, look for any abnormal tire wear.
Step 2: Circumnavigate the block with the car. Make turns where you may fully turn the steering wheel in one direction. Keep an ear out for any clicking or popping noises. The tires are designed to maintain constant touch with the road and provide a cushion when driving.
Step 3: If the tires are cupped or have uneven wear patterns, they may lose contact with the road, making the ride unpleasant with clicking or popping noises. While inspecting the tires for noises, feel the steering wheel for any movement that would occur if the tires moved in.
Step 4: Drive over any bumps or potholes. This inspects the condition of the vehicle’s rebound response within the tires and shocks. Shocks are used to keep the tires in constant contact with the road. When the tires have cupping, they seem rough and lead the driver to believe that there is an issue with the shock absorber.
More: Different Types of Tires and Their Purpose
Preparing the Vehicle to Check the Tires
Materials Needed
- Flashlight
- Jack 2 ton or bigger
- Jack stands
- Wheel chocks
Step 1: Park your vehicle on a flat, hard surface. Make sure that the transmission is in park (for automatics) or in 1st gear (for manuals).
Step 2: Place wheel chocks around the rear tires that will be remaining on the ground. Engage the parking brake to the lock the rear tires from moving.
Step 3: Raise the vehicle. Using a floor jack that is recommended for the weight of the vehicle, lift under the vehicle at its specified jacking points until the wheels are completely off the ground.
Step 4: Place the jack stands. The jack stands should go under the jacking point locations. Then lower the vehicle onto the jack stands. For most modern cars, the jacking points for jack stands will be on the pinch weld just under the doors along the bottom of the car.
Examining the Tires’ Condition
Step 1: Take out your flashlight and visually inspect the tires. Remove the parking brake if you’re working on the back tires and shift into neutral if you’re working on the front tires of a front-wheel-drive car. If you’re working on the back tires, you may need to put the transmission in neutral. It all depends on whether your vehicle has an automatic or manual transmission.
Step 2: Rotate the tires and inspect the tread for cupping. Examine the tread for any additional patterns that might indicate an alignment problem.
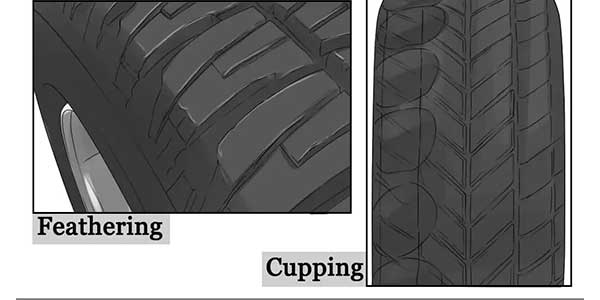
Important note: If the tires are cupping on the tread, the shock absorbers are worn out and are causing the tires to bounce during coil oscillations. The tires and shock absorbers would need to be replaced. If the shock absorbers have been replaced, the tires must also be replaced for safety.
After the diagnostic, the car is lowered.
Step 1: Gather all of your tools and creeper and position them out of the way.
Step 2: Raise the car. Lift beneath the car at its stated jacking locations using a floor jack appropriate for the vehicle’s weight until the wheels are entirely off the ground.
Step 3: Remove the jack stands and keep them far away from the vehicle.
Step 4: Lower the vehicle to where all four wheels are on the ground. Pull out the jack and put it aside.
Step 5: Remove the wheel chocks from the rear wheels and put them aside.
Part 6 of 6: Detecting a loose suspension
Materials Needed
- Flashlight
Suspension parts on automobiles wear out over time under regular driving circumstances. Most automobiles are driven in locations other than on roadways. Most operators believe that vehicles, like trucks, can go off-road without incident. As a result, the suspension components wear out more frequently.
Vehicles with high suspension lifts are at risk of suspension parts failing. Lifted automobiles have several suspension elements that require more maintenance than a regular suspension system.
Step 1: Using a flashlight, visually inspect the vehicle’s suspension. Examine the suspension for any damaged or broken parts.
Note: If you see any broken suspension parts, you must get them fixed before testing the car. As a result, there is a safety issue that must be addressed.
Step 2: Circulate the car around the block. Keep an ear out for any clicking or popping noises.
Step 3: Drive over any bumps or potholes. As the tires and suspension move, this tests the condition of the suspension.
Step 4: Step on the brakes hard and accelerate hard from a stop. This will check for any horizontal movement within the suspension system. A loose suspension bushing may not transmit noise when in normal operation, but can move around during a hard stop and fast take off.
- Note: If your vehicle has been in an accident before, the suspension could be set back on the frame to fix an alignment issue. The setback can result in problems with the suspension coming loose or deteriorating the bushing faster than normal.
Preparing the Vehicle to Check the Suspension
Materials Needed
- Flashlight
- Jack (2 ton or bigger)
- Jack stands
- Long pry bar
- Wheel chocks
Step 1: Park your car on a level, firm surface. Check that the gearbox is in park (for automatics) or first gear (for manuals) (for manuals).
Step 2: Secure the rear tires that will stay on the ground with wheel chocks. Apply the parking brake to prevent the back tires from moving.
Step 3: Raise the car. Lift beneath the car at its stated jacking locations using a floor jack appropriate for the vehicle’s weight until the wheels are entirely off the ground.
Step 4: Place the jack stands. The jack stands should go under the jacking point locations. Then lower the vehicle onto the jack stands. For most modern cars, the jacking points for jack stands will be on the pinch weld just under the doors along the bottom of the car.
Examining the Suspension’s Condition
Step 1: Using a flashlight, examine the suspension system. Examine the pieces to see whether they are broken, twisted, or loose. Using a wrench, check the mounting bolts to the knuckle and verify they are snug.
Step 2: Get yourself a long pry bar. Check for any movement by prying up on the tires. Make a note of where the movement is coming from. If the ball joint is worn, the mounting knuckle bolts are loose, or the hub bearing is worn or loose, the wheels may move.
Step 3: Lift the hood to gain access to the engine area. Locate the suspension arm mounting bolts. Using a wrench, check to see if the bolts are tight.
Note: If your suspension is a strut then you need to check the strut for any damage or looseness. Refer back to the section of this article about worn or damaged struts.
After The Diagnostic, The Car Is Lowered.
Step 1: Gather all of your tools and creeper and position them out of the way.
Step 2: Raise the car. Lift beneath the car at its stated jacking locations using a floor jack appropriate for the vehicle’s weight until the wheels are entirely off the ground.
Step 3: Remove the jack stands and store them in a safe place away from the car.
Step 4: Lower the car until all four wheels are in contact with the ground. Remove the jack and set it aside.
Step 5: Take the wheel chocks off the back wheels and set them aside.
About The Author
Ibrar Ayyub
I am an experienced technical writer holding a Master's degree in computer science from BZU Multan, Pakistan University. With a background spanning various industries, particularly in home automation and engineering, I have honed my skills in crafting clear and concise content. Proficient in leveraging infographics and diagrams, I strive to simplify complex concepts for readers. My strength lies in thorough research and presenting information in a structured and logical format.
Follow Us:LinkedinTwitter